 Photo: B&D Rockeries
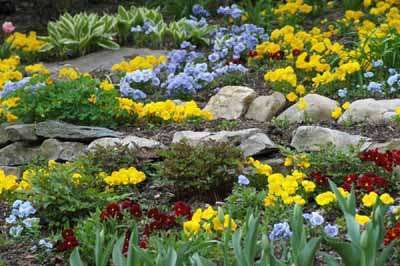
Rock gardens can be popular for clients if done correctly.
According to B&D Rockeries, rock gardens have been around since 785 A.D. when the Japanese invented them. The trend has not slowed in the slightest.
The company has provided 10 steps on how to create an ideal rock garden.
Two Reasons to Landscape with Rock Gardens
1. Rock gardens are an investment
If the yard has awkward slopes and dead grassy areas, consider putting in a rock garden. Rock gardens are made up of different-sized rocks and small flowers, which make it easy to keep in good condition.
2. Rock gardens blend into landscapes
Instead of looking awkward and out of place like some gardens, such as vegetable gardens, can appear, a well-designed rock garden can blend into and complement a landscape.
10 Step Guide to Landscaping with Rock Gardens
1. Pick a spot in the yard
The best spot to build a rock garden in the yard would be on a place that has a slight slope that gets a lot of sun. However, a raised bed works as well.
2. Install a good foundation
The soil that you choose should drain well but not too fast. It should be able to retain an adequate amount of water to keep your plants alive and healthy. Begin by sectioning off the area that you picked with posts and then dig down at least 1 foot (3 feet for a raised bed). After you have finished, remove every single weed and root from the soil. Next, build the walls of the rock garden with brick or concrete and fill in the foundational layers.
3. Lay down the drainage layer
The drainage layer should be comprised of clunky rocks, broken pieces of clay pots, old pieces of brick, or old pieces of concrete. This is the layer that absorbs extra moisture from the above soil and should take up about ⅓ – ½ of the plots depth.
4. Put down a layer of sand
After you have put down the drainage layer, you should layer about 2-3 inches of sand on top of it that will hold up the topsoil.
5. Put down the soil layer
Mix together a soil that will keep flowers healthy. The recommended mix is comprised of the following elements.
- ⅓ small gravel
- ⅓ leaf mold
- ⅓ topsoil
6. Pick out the rocks
The best option for making your rock garden look natural and blend in with the rest of the yard is to use rocks that are already in it. When picking out rocks, choose a variety sizes, but try to select rocks that are similar in texture and appearance.
7. Place the rocks
When you lay down rocks, arrange them in a way that looks natural. Also, dig boulder-sized rocks into the ground at least ⅓ of the way so that they do not look out of place.
8. Leave it alone
It would actually be best if you left the garden alone for a time. After a couple of weeks, the soil will fall, so wait until then to fill the voids with leftover soil.
9. Plant flowers
After your rocks have settled into place, it will be time for you to plant the flowers.
10. Enjoy the space
Since rock gardens do not require very much maintenance, the only thing will be pulling a weed once in a while.


