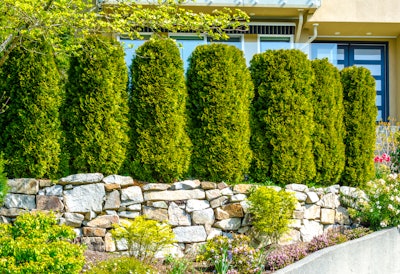
In most residential areas today, homes are closer together than some homeowners would like them to be, which means your customer could benefit from having just a little more privacy incorporated into his/her yard.
To help your customers maximize their outdoor space, why not try to create an atmosphere that offers a fair amount of privacy while still maintaining the elegant look they crave?
Take a look at a few ways you can maximize space and create something appealing to look at, all while providing your clients with some much-needed privacy.
Privacy hedges
Size and layers
When choosing which plants will go into the privacy space, it’s always important to keep in mind that they won’t stay one size forever.
Take stock of the size of the yard and in which area they will be planted, and from there you can determine what will fit best in the space. Experts agree that when in doubt, planting fewer plants in the space is preferable, as they will grow into the area and create a full, lush look down the road.
If, however, your clients are impatient and want a more instantaneous fix, consider still planting fewer plants but opting for ones that are larger, as this will limit the initial number of plants present while still adding to the privacy aspect your customers crave.
Remember that it can also be beneficial to have more than one plant type in the space, as this will help keep the hedge up and functioning even if one type dies off or gets infested with pests. Having more than one type in the hedge will also allow the plants to look more natural and keep them from retaining a uniform look, if your customer desires this jungle-like look.
To help create some eye-catching layers, stagger evergreens in the background, and in the foreground, step down the height by using deciduous materials to provide more depth, color, and texture.
Spacing and training
Depending on how dense your customer wants their hedges to be and how much space they have available will determine the number of rows you’ll need to plant.
Spacing between the rows will be based on the width of the hedge’s crown, but as a minimum measurement, set plants at least 12 to 24 inches apart to avoid root crowding.
According to the Arbor Day Foundation, evergreen trees, such as junipers or cedars, will need about 6-8 feet between trees, while pines and spruces can have about 10-12 feet between.
When working with mid-sized evergreen shrubs, the Arbor Day Foundation recommends keeping them 3-4 feet apart, and for narrow shrubs, it’s recommended that they be 24 inches apart.
Once the shrubs have established and begin to grow plentifully, it’s a good idea to train the hedge by trimming the tops and sides a few times a year as you see necessary. During this process, be sure to remove about one-half of the new shoots.
Most needled evergreens will make their growth earlier on in the season, and most broadleaf evergreens and deciduous plants will grow over a longer period of time.
To allow sunlight to reach the lower leaves, the best shape for hedges are wider at the base and slimmer at the top.
Maintenance
Don’t forget to talk to your customer about how often they will want their hedges maintained, as this could change their opinion about what type of plant they want to be installed.
Clipped hedges, such as formal boxwoods, will require much more effort with maintenance than informal, natural-looking options like viburnum. Once your customers decide how often they want you to come back to trim these hedges up, you can move forward with them to choose a type that suits them best.
Other privacy methods
Fences, lattice, and containers
For customers who don’t particularly want a green privacy element in their space, there are traditional elements like fences and walls that can also be installed.
For spaces that have less space to work with, a traditional board fence could prove to be an ideal solution, as they can come in various styles that can fit a multitude of home designs.
Screens made from lattice can be set into the ground to create an enclosed corner or make more U-shaped structures that can help preserve desirable views. To maximize flexibility, think about placing the post ends in lightweight planters with wheels, and when anchoring them, either add concrete plugs to the feet or set the posts in gravel. This will allow your customers the ability to move these structures.
If your customers don’t have the proper area in their yard to plant more or install fences, consider incorporating container gardens in the space to still give them the privacy wall they desire.
Potted plants can be positioned to create a green screen around a seating area, patio, or raised deck. For the best results, these containers should be raised up on casters or made of lightweight materials to easily move them around when need be.
To give your customers a display that will be long-lasting, combine more showy annuals with ornamental grasses, shrubs that will change the color of their leaves in the fall or dwarf evergreens to create a healthy mix of foliage types, textures, and colors.


