 Photo: McKay Landscape Lighting
Outdoor lighting is a popular upgrade for customers who want to extend the amount of time they can spend outside. It can also provide beauty, safety, and security to your clients' landscapes.
Landscape lighting often is more of an art than a science, but landscapers can remove some of the guesswork by reviewing the lighting at all stages of the installation, especially at night.
Below are some of the various elements to consider when installing lighting in a landscape, what specific effects achieve, and when to use them.
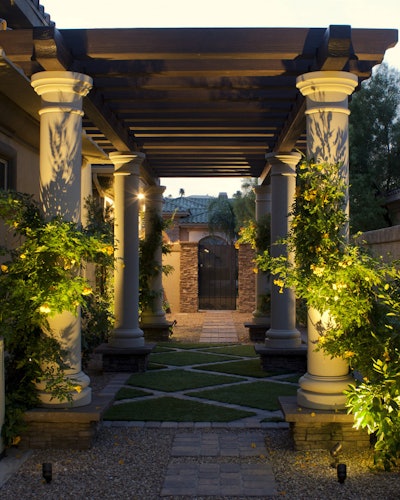 Lighting can help make your customer’s space both beautiful and functional after dark.
Photo: Chip-N-Dale’s Custom Landscaping
What to light
If you’re just getting into landscape lighting, you might think it’s your job to simply light up everything in the space, but it’s more about balancing between what you should light up and what should be left in the dark.
When thinking about your lighting plan, the first goal should be function. Consider what needs to be well-lit for safety and security. This includes entryways, paths, stairs, and any hazards such as slopes, rocks, or ponds. Look at the house and see if there are any areas where intruders could easily hide and light these spots up as well.
The other aspect of landscape lighting is highlighting certain features and bringing drama to the space. Some features that look simply average in the daylight can turn into showstoppers once the spotlight is put on them.
Effects to use
Depending on what goal you are trying to achieve will determine what lighting techniques are best for a customer’s space. This list isn’t a comprehensive collection of all the options available, but rather some of the common effects that you can use.
Uplighting
Uplighting is well-suited if you are wanting to highlight a specific specimen tree’s trunk and structure. One or two fixtures should be placed at the base of the tree and be pointed upwards if you want to highlight the trunk.
A fixture can be placed 8 to 10 feet away to illuminate the canopy of the tree. Uplighting can help draw attention to different focal points and create a beautiful visual.
You might also consider lighting specimen trees and shrubs within the landscape or details of the home's architecture (like columns or brickwork). This is another way to add visual appeal.
Moonlighting
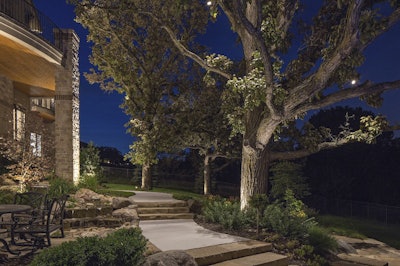
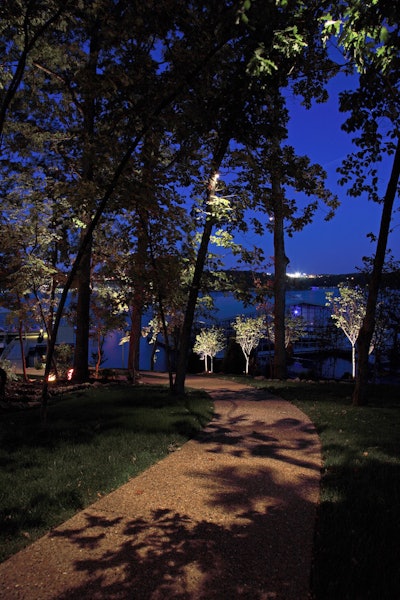 Moonlighting can cast interesting shadows while lighting paths below.
Photo: McKay Landscape Lighting
The opposite of uplighting a tree is moonlighting, where the light is filtered down through the foliage of the tree. It can draw attention to things at the base of the tree and creates a natural nighttime light that highlights and casts shadows as a full moon might cast.
With moonlighting, you can ultimately get more coverage than having path lights on the ground. In fact, if you're able to install enough moonlighting, it can take the place of path lights, allowing people to safely navigate the space.
Silhouetting
Use silhouetting when you want to use landscape lighting to show off plants with a distinct structure or leaf shape. A spread light should be placed between the plant material or other structure whose shadow you’re wanting to cast and an adjacent flat structure.
Multiple fixtures may be needed depending on how much of the wall needs to be lit.
Shadowing
The reverse technique of silhouetting is shadowing. It involves washing a feature with light so it will cast an eye-catching shadow on a wall. The fixture needs to be placed directly in front of what you are trying to play up for the shadow to appear properly.
The farther away the fixture is from the object, the less intense the shadows will be on the wall, house, or structure.
This type of lighting should be done from low down and angled upward to provide a greater dramatic effect.
Grazing
If your customer has interesting textures in their hardscaping, take advantage of highlighting this feature by grazing.
Grazing is a technique where light is directed across a vertical surface to draw attention to the rich textures of a retaining wall or other hardscape elements. This involves placing a light close to the flat surface and aiming directly up or down the surface for dramatic shadows.


