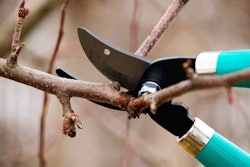
Photo: Pexels
It’s a common mistake perpetuated by misconception. The mistake: planting trees in holes that are too deep. The misconception: the top of the root ball constitutes where the tree roots begin. If you misjudge the latter, you’re sure to fall into the trap of planting trees in holes that are too deep, essentially burying them. The result: an underdeveloped, weak tree that will never reach its potential. Although it may take years to finally die, it will never be the vigorous landscape centerpiece you envisioned.
When you plant tree roots too far underground, the tree develops a secondary root system to compensate for the lack of moisture it should be receiving. These secondary roots grow toward the surface rather than out from the tree. They can even grow around the trunk of the tree, girdling and suffocating it. Trees planted too deeply are also susceptible to trunk rot and primary root suffocation.
To plant a tree at the proper depth, you need to determine trunk flare. Trunk flare is where the roots spread at the base of the tree, which indicates the topmost tree roots. If you’re working with a balled-and-burlapped tree, probe the top of the root ball to determine the location of the top roots. They will not always be at the top of the root ball and can be as much as a foot beneath it. Once you find the top roots, measure how far into the root ball they are, and subtract that from the depth of your planting hole. Ideally, the trunk flare should be partly visible (by 1 to 2 inches) after you have planted the tree. It is better to plant the tree a little high than too deep. Planting 2 to 3 inches above trunk flare will allow for some settling.
Know that the new roots will grow horizontally from the root ball, not downward. So as you dig, plan for your planting hole to be about three times the diameter of the root ball.
Are your customers’ trees’ health at stake?
Staking a tree after planting is not required in most landscape situations. In fact, most arborists agree that you should stake a tree only if there is realistic danger of the wind blowing it over. Studies show that trees perform better if they are not staked, establishing more quickly and developing stronger trunks and root systems. However, if you need to stake a tree because it is top heavy or in a high-traffic area where it might get knocked over, you should know how to do it correctly.
Choose your materials carefully. You don’t want to put anything against delicate bark that will rub or damage it, or any tight materials that will restrict growth. Instead, use a flexible tie material such as 3-inch webbing or polyethylene strips. The number of stakes you’ll need varies by tree size. A smaller tree (with a trunk 3 inches or less in diameter) may require only one stake on the windward side, while a larger tree may need to be staked in three directions.
Position the tie material on the lower half of the tree and staple or tie it to the stakes. You want the tension between the stake and the tree to be taut, but not so tight that it’s pulling the tree toward the stake. Maintaining flexibility is important because the material should be able to grow and move with the tree, and some swaying will help the tree grow stronger roots. Drive the support stakes about 18 to 24 inches into the ground. Remove the support stakes and ties after the first year of growth. By then, roots will have taken hold and be strong enough to support the tree.
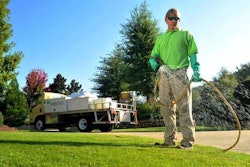
Got an underperforming lawn or trees? Maybe soil compaction is the problem
Soil compaction can happen for a variety of reasons. Foot traffic or vehicular traffic directly on turf are some of the main causes of compaction, but even the use of sidewalks and driveways can cause compaction to radiate to surrounding turf-planted areas.
Compaction makes it difficult for water and nutrients to reach plants, and can cause considerable decline and even death. It’s easy to alleviate compaction on turf through aeration; however, for compaction around trees, the remedy is not as simple because you have to be careful not to damage the root system. One method that can provide trees some compaction relief is vertical mulching (also called vertical trenching), which penetrates soil to help get water, oxygen and nutrients to the roots. Before beginning any vertical mulching, call to have utility lines marked to avoid cutting power, gas or water lines.
For large trees, begin trenching at or beyond the tree’s dripline, slowing working your way toward the trunk. Where the trench ends will depend on the size of the tree. The trench should stop 6 inches out for every inch of trunk diameter. For example, if the tree is 10 inches in diameter, stop the trench five feet away from the trunk.
For newly planted trees, you can trench all the way up to the root ball. There is no set standard for the depth or width of the trench. A good guide is to make the trenches 2 feet deep and 4 inches wide, but trenches can be up to 24 inches wide. Make several trenches around the tree. As you trench, be careful not to cut roots larger than 1 inch in diameter.
Backfill the trenches with sand, topsoil or native soil mixed with wood chips. All of these have proven to relieve compaction because they create more air space, encouraging root growth.