But while the equipment and its purpose are not complicated, keeping a hole digger running and productive requires some attention.
The following are basic maintenance and operational tips to get the most out of a hole digger.
1. Read it and reap
We know, sitting down and reading an operator’s manual doesn’t sound like the most exciting way to spend 15 minutes. And that’s compounded by the fact that a hole digger is a pretty basic machine. But manufacturers spend a lot of time and money putting together manuals that offer almost everything needed to get the most out of the machine.
For one, manuals will include service interval information for all key components. Regardless of how on top of maintenance schedules a person might be, the manual provides easy-to-follow guidelines to keep all key components in optimal condition throughout their service life.
Secondly, most manufacturers include best practices information in their manuals to highlight operational aspects, which may be different from one hole digger design to the next. This can be valuable for novices and seasoned veterans alike.
2. A bit of advice
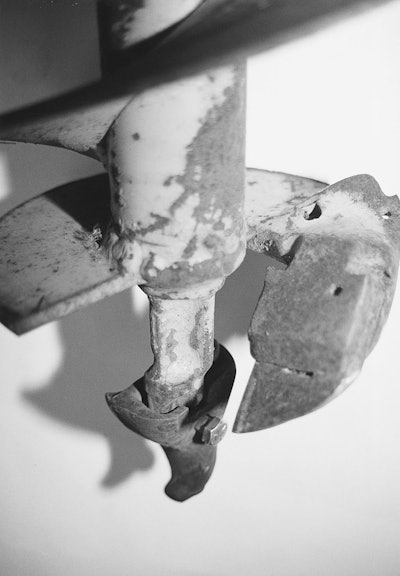
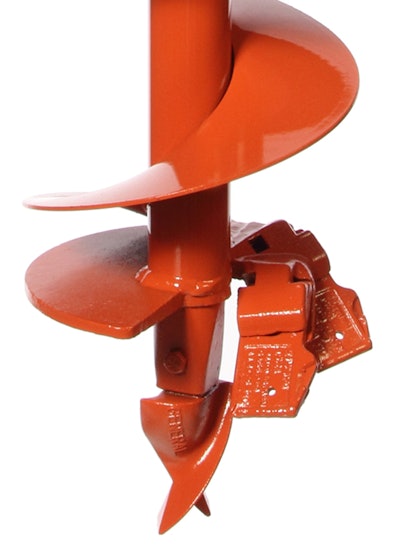
Before starting to dig, first check the condition of the wear parts, such as the auger’s screw bit and teeth, to ensure proper performance.
The screw bit, or pilot point, is the very tip of the auger. It’s critical that the screw bit is in good condition because this is what keeps the auger tracking straight during use. Unfortunately, it’s not uncommon to find earth augers in service with screw bits that are either completely worn down or, worse yet, completely gone.
Making sure the auger has adequate teeth is another commonly ignored maintenance issue. The teeth located at the bottom of the auger flighting are primarily responsible for digging, whereas the flighting is designed to push the loosened dirt up out of the hole. When the teeth are in good shape, the auger can aggressively dig in most materials. But if the teeth are worn down or missing, the stress is then placed on the auger flighting to do the digging, which severely limits performance and creates another wear issue.
|
|
|
3. Site insights
Another key step before doing any digging is to do a complete site review and understand as much as possible what one might be digging into. Obviously, any digging project could grind to a quick and disastrous halt if the auger happens to strike an underground utility line. Therefore, always call an underground locating service before breaking the surface.
Even if the site is clear of buried cables and utility lines, try to identify any natural obstructions, such as rocks or tree roots. This not only could hinder getting the job done, but also could result in damage to the digger and/or injury to the operator. Always know the limitations of a piece of equipment. If one encounters an obstacle, stubbornly attempting to force the auger through impassable soil can end badly.
Lastly, try to avoid digging on a slope. If a hole must be dug on uneven terrain, just take extra precautions to ensure the operator keeps proper balance throughout the application.
4. Start me up
The operator understands the equipment, the hole digger looks good and the site is properly prepped. Now it’s time to start up the machine. Though this seems pretty straightforward, pay attention to the starting instructions provided by the manufacturer. Every machine is designed differently, and there is a proper startup position to keep the operator away from the engine exhaust muffler. Failing to use the proper starting position could result in serious injury if the operator comes in contact with the hot surface.
Once started, allow the engine to warm up to a point where the digger will operate without the engine choke. And keep in mind that in cold weather, initial starting may require more pulls.
5. Properly positioned and prepared
Simply put — always be prepared for kickback. Obviously, when working in rocky soils or areas with many obstructions, this is a given, and one should anticipate the situation by operating at less than full digging speed. But even in seemingly clear areas, the potential of kickback should be considered.
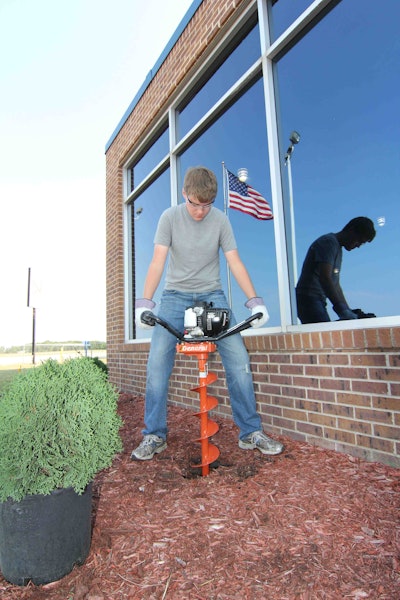
The best way an operator can minimize the effects of kickback is with proper body positioning. Keep the left side of the equipment handle as close as possible to the left hip/leg area. Upper arms should be kept as close to the body to maximize leverage. Also, when the auger digs down, the operator’s back should be kept vertical while bending at the knees, as necessary. Lastly, the feet should be positioned with the left foot ahead of the right foot at a comfortable distance.
6. Easy extraction
When finished digging one hole, it’s time to get the digger out and onto the next. The best way to remove the auger depends on the desired result. If a clean hole is ideal, stop the auger’s rotation before removing to minimize the amount of loose soil left at the bottom. Otherwise, if speed is preferred, keep the auger rotating slowly while lifting out for quicker, easier removal.
If the engine is stopped with the auger still underground, ideally remove the machine from the hole before restarting. Only a skilled hole digger operator should attempt to restart the engine while the auger remains in the hole. And when moving between holes, make sure to stop the engine to reduce the risk of injury.
EDITOR’S NOTE: This article was written by Dennis Von Ruden, president, General Equipment Company.
