A French drain can solve many drainage dilemmas. It can divert run-off wherever water pools, collects or threatens building and landscape installations. Since a French drain can be covered with turf or mulch after installation, it’s also virtually invisible.
Though the traditional design simply was a gravel-filled trench, you’ll obtain far better results by employing a drainage pipe, landscaping fabric and a few high-tech tweaks.
While a modest-size drain can be installed with hand tools and basic measurements, those running more than 12 feet long will be more efficiently installed with equipment such as a compact excavator or compact tool carrier.
Also, use a laser transmitter to ensure the proper grade is maintained.
A drain running more than 12 feet long will be more efficiently installed with equipment such as a compact excavator or compact tool carrier.
1: Assess the site
Determine drainage needs and which areas are holding water. Mark the path you’re draining to with flags. Your options may be an existing drain, creating a draining field or routing to a drainage pond.
Ask owner for as-built irrigation plans or info regarding other potential obstacles, such as landscape lighting wiring paths. Also, call 811 (Call Before You Dig hotline) to locate underground utilities that may lie in the path of the drain.
2: Determine the trench size based on drainage needs
For the project shown, the dimensions are 18 inches wide by 18 inches deep to start. “Remember the depth of the trench varies based on the natural slope of the land. If you have to go through a rise in the property, the trench will be deeper, but still must maintain the desired slope,” says Robert Gilles, marketing manager, Bobcat Company. “Vice versa, if there is a low spot that you go through.”
3: Establish the overall gradient of the areas in question and a path for the drainage system
Ensure at least a 0.5-percent slope or 1 to 2 percent for best results. Here, the trench will be dug for a 1/8-inch drop every 6 feet. Plot and measure the length of the drainage system.
4: Estimate materials needed
Based on the volume and length of the planned system, determine materials required: length of drainage pipe and connectors, pea or crushed rock and yards of landscape fabric.
5: Remove and roll sod to be reused
6: Start trenching to required rough depth
A ruler will suffice for measurement checks.
7: Set up laser transmitter
Enter the required depth calculations.
8: Place laser receiver on arm of excavator
Line up laser beam with the receiver at the required depth. The receiver will notify the operator when the required depth is reached with an audible alert.
9: Dig the entire trench
10: Periodically stop for job “foredog” inspection and approval
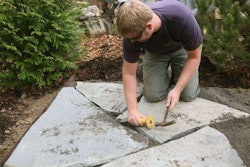
11. Line trench with landscaping fabric
It should allow coverage of the trench’s width and depth, plus overlap of drainage pipe and gravel. It may require two widths of overlapping fabric.

12: Pour rock
Distribute approximately 2 inches of rock atop the fabric at the bottom of the trench.
TIP: You may be asked if a French drain has its origins in France, but it actually couldn’t be more American. It was invented in Concord, Massachusetts by Henry Flagg French, who included it in his book on farm drainage published in 1859.
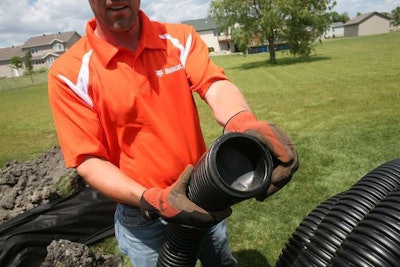
13: Lay drainpipe
Cap the end at beginning of the system.
14. Fill trench with rock
Level rock 4 inches from the top of the trench. Note: If you just dump rock on top of the pipe, it will shift to one side of the trench. Make sure to keep it in the middle of the trench.
15. Fold fabric over the rock
16. Replace soil and sod
Allow the materials to settle with the aim of reestablishing sod at ground level.