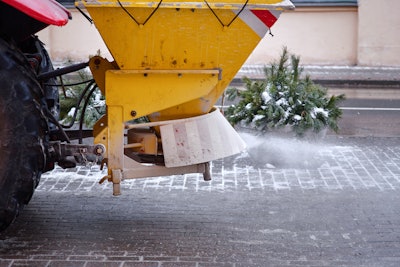
Even though there may be no snow on the ground in some areas, now is the time to talk about gearing up for snow removal season. In locations that get hit with serious snowstorms, people have learned not to wait until the snow begins to lock in plowing, sanding and salting contracts. Your potential clients, after all, will need time to check your qualifications and insurance.
Getting started with snow removal
The sooner you can make an educated estimate of your workload going into the season, the more accurately you can calculate the materials and equipment you’ll need.
Prices of services and cost estimating can vary each year, so you’ll need to plan your budget accordingly. Also, make a point to check your supply of salt and restock if it looks low. Given the importance of salt supplies, the last thing you want is to run out of salt in the middle of the season.
This can also be an excellent time to scope out your client’s land and analyze potential danger zones. Once you’ve gone over the landscape, go back over your findings with the client and explain to them exactly how you plan to tackle the job.
When talking to potential clients, be upfront about what kind of equipment you can bring to the job and what you estimate the cost to be.
Don’t shy away from answering questions your customers may have, as this can help establish a better working relationship with them in the long run. Be sure not to ignore any questions your customers ask, whether in person or on a request for proposal (RFP).
Leaving off any information can cause them to seek other companies for help, so be detailed when answering inquiries. Having reliable references on RFPs can also go a long way, even if the interested customer doesn’t follow up with said references.
When presenting your company contract to a customer, make sure that the following topics are covered in the contract: Scope of services, payment terms, who’s responsible for damages and a certificate of insurance.
Heavy snow preparation
When large amounts of snow are expected, it’s better to go ahead and plow during the storm rather than let it accumulate. If the snow is allowed to get too deep and sit too long, it will harden and become almost impossible to move.
Always be sure that your equipment is in top condition and can handle the ice-covered roads, high winds, and low visibility when traveling to a customer’s property in a snow storm. Be sure to check the battery, lights, fluid levels, and tire pressure before heading out, and always keep an emergency kit on hand for both your crew and your snowplow.
When constructing a snowplow kit, include the following: extra hydraulic fluid, hydraulic hoses, a pump solenoid, extra cutting-edge bolts, and a trip spring.
Your emergency kit should include the following: a flashlight, flares, an ice scraper, jumper cables, a first aid kit, extra clothing, a blanket, shovel, gloves, water and snacks, and a phone or two-way radio.
Snow plowing in parking lots
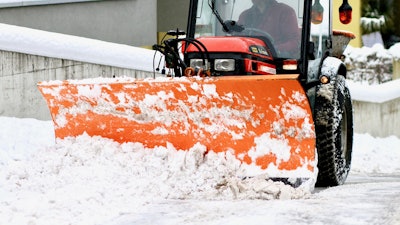 Photo: Pixabay
If your company is tabbed to handle clearing parking lots and sidewalks, be sure to shovel them beforehand so the snow can be easier to plow away.
Areas in front of buildings and overhead doors should be plowed first; with the blade raised, drive up to the building and drop the blade to drag the snow away from the building. Turn the vehicle around and back into the cleared area, and then push the snow to the outer edges of the lot.
After taking care of the front of the buildings, make a pass down the center of the lot, and push snow in windrows to the outer edges.
If you can tell ahead of time that there will be a significant amount of snowfall, be sure to push as much bulk off the lots as possible. It’s also a good idea to break the plowing up into smaller sections for larger lots.
Whenever possible, plow in straight lines and always keep the direction of the wind in mind, as piling downwind will prevent drifting. Snow should not be piled near handicapped parking areas or next to the road where it can block the visibility of cars leaving and entering the parking lot.
Basic snow plow practices
The following tips were created by Boss Snowplow:
- Before it snows, explore the properties you have to plow. Note items like speed bumps, shrubs, water drains, pipes, sidewalk edges and the like to prevent damage to the plow and area being plowed. Mark objects that will be hard to see after a snowfall.
- Plan your plowing pattern so you drive forward as much as possible.
- Come to a complete stop before shifting into reverse.
- When in reverse, do not rely on vehicle mirrors. Turn and look where you’re going.
- Do not exceed 40 mph when transporting a plow. Do not exceed 14 mph when plowing.
- When plowing on dirt or gravel, lower the plow shoes. This will prevent the blade from scraping the surface away.
- When plowing on asphalt or concrete, raise or remove the plow shoes to scrape the surface as close as possible.
- When you are done plowing, lower the blade to the ground and turn the plow control off for safety. It will also take stress of the hydraulic components.
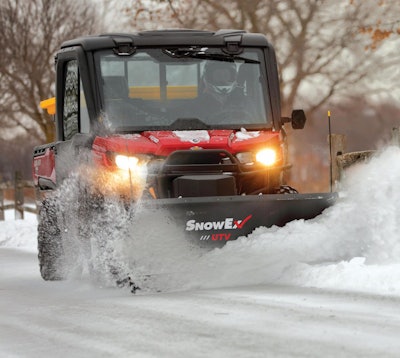 Photo: SnowEx

